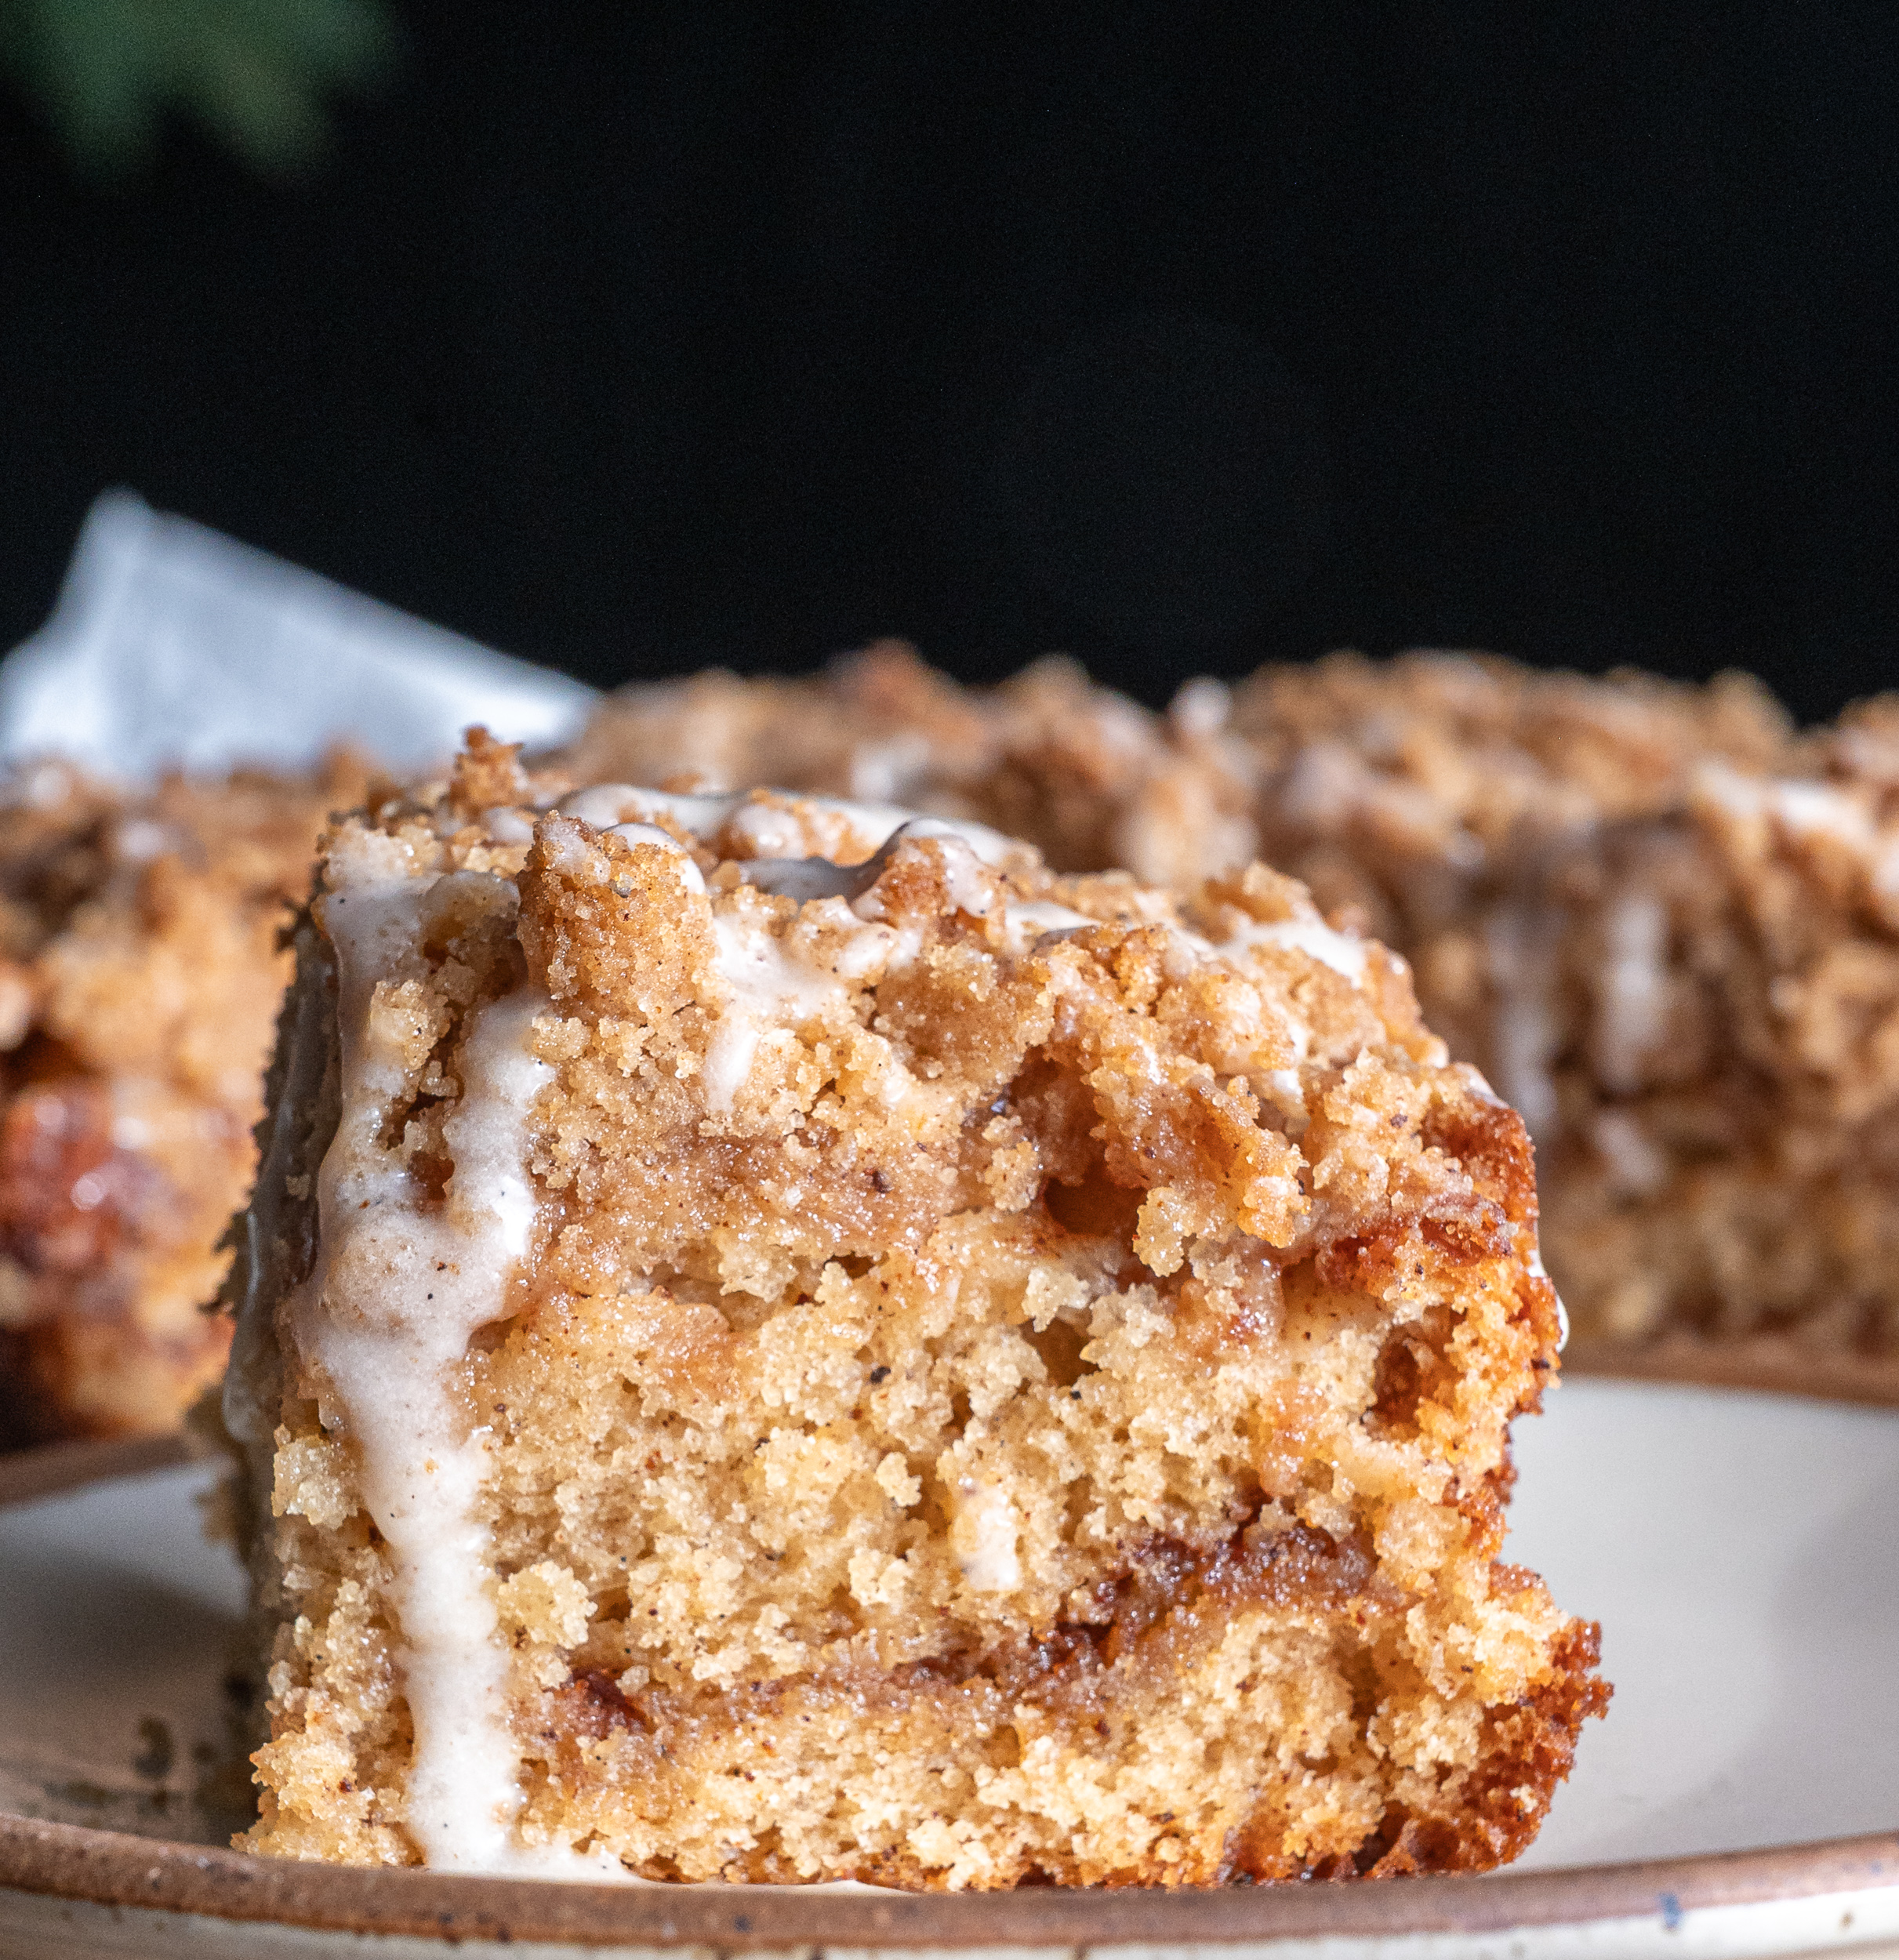
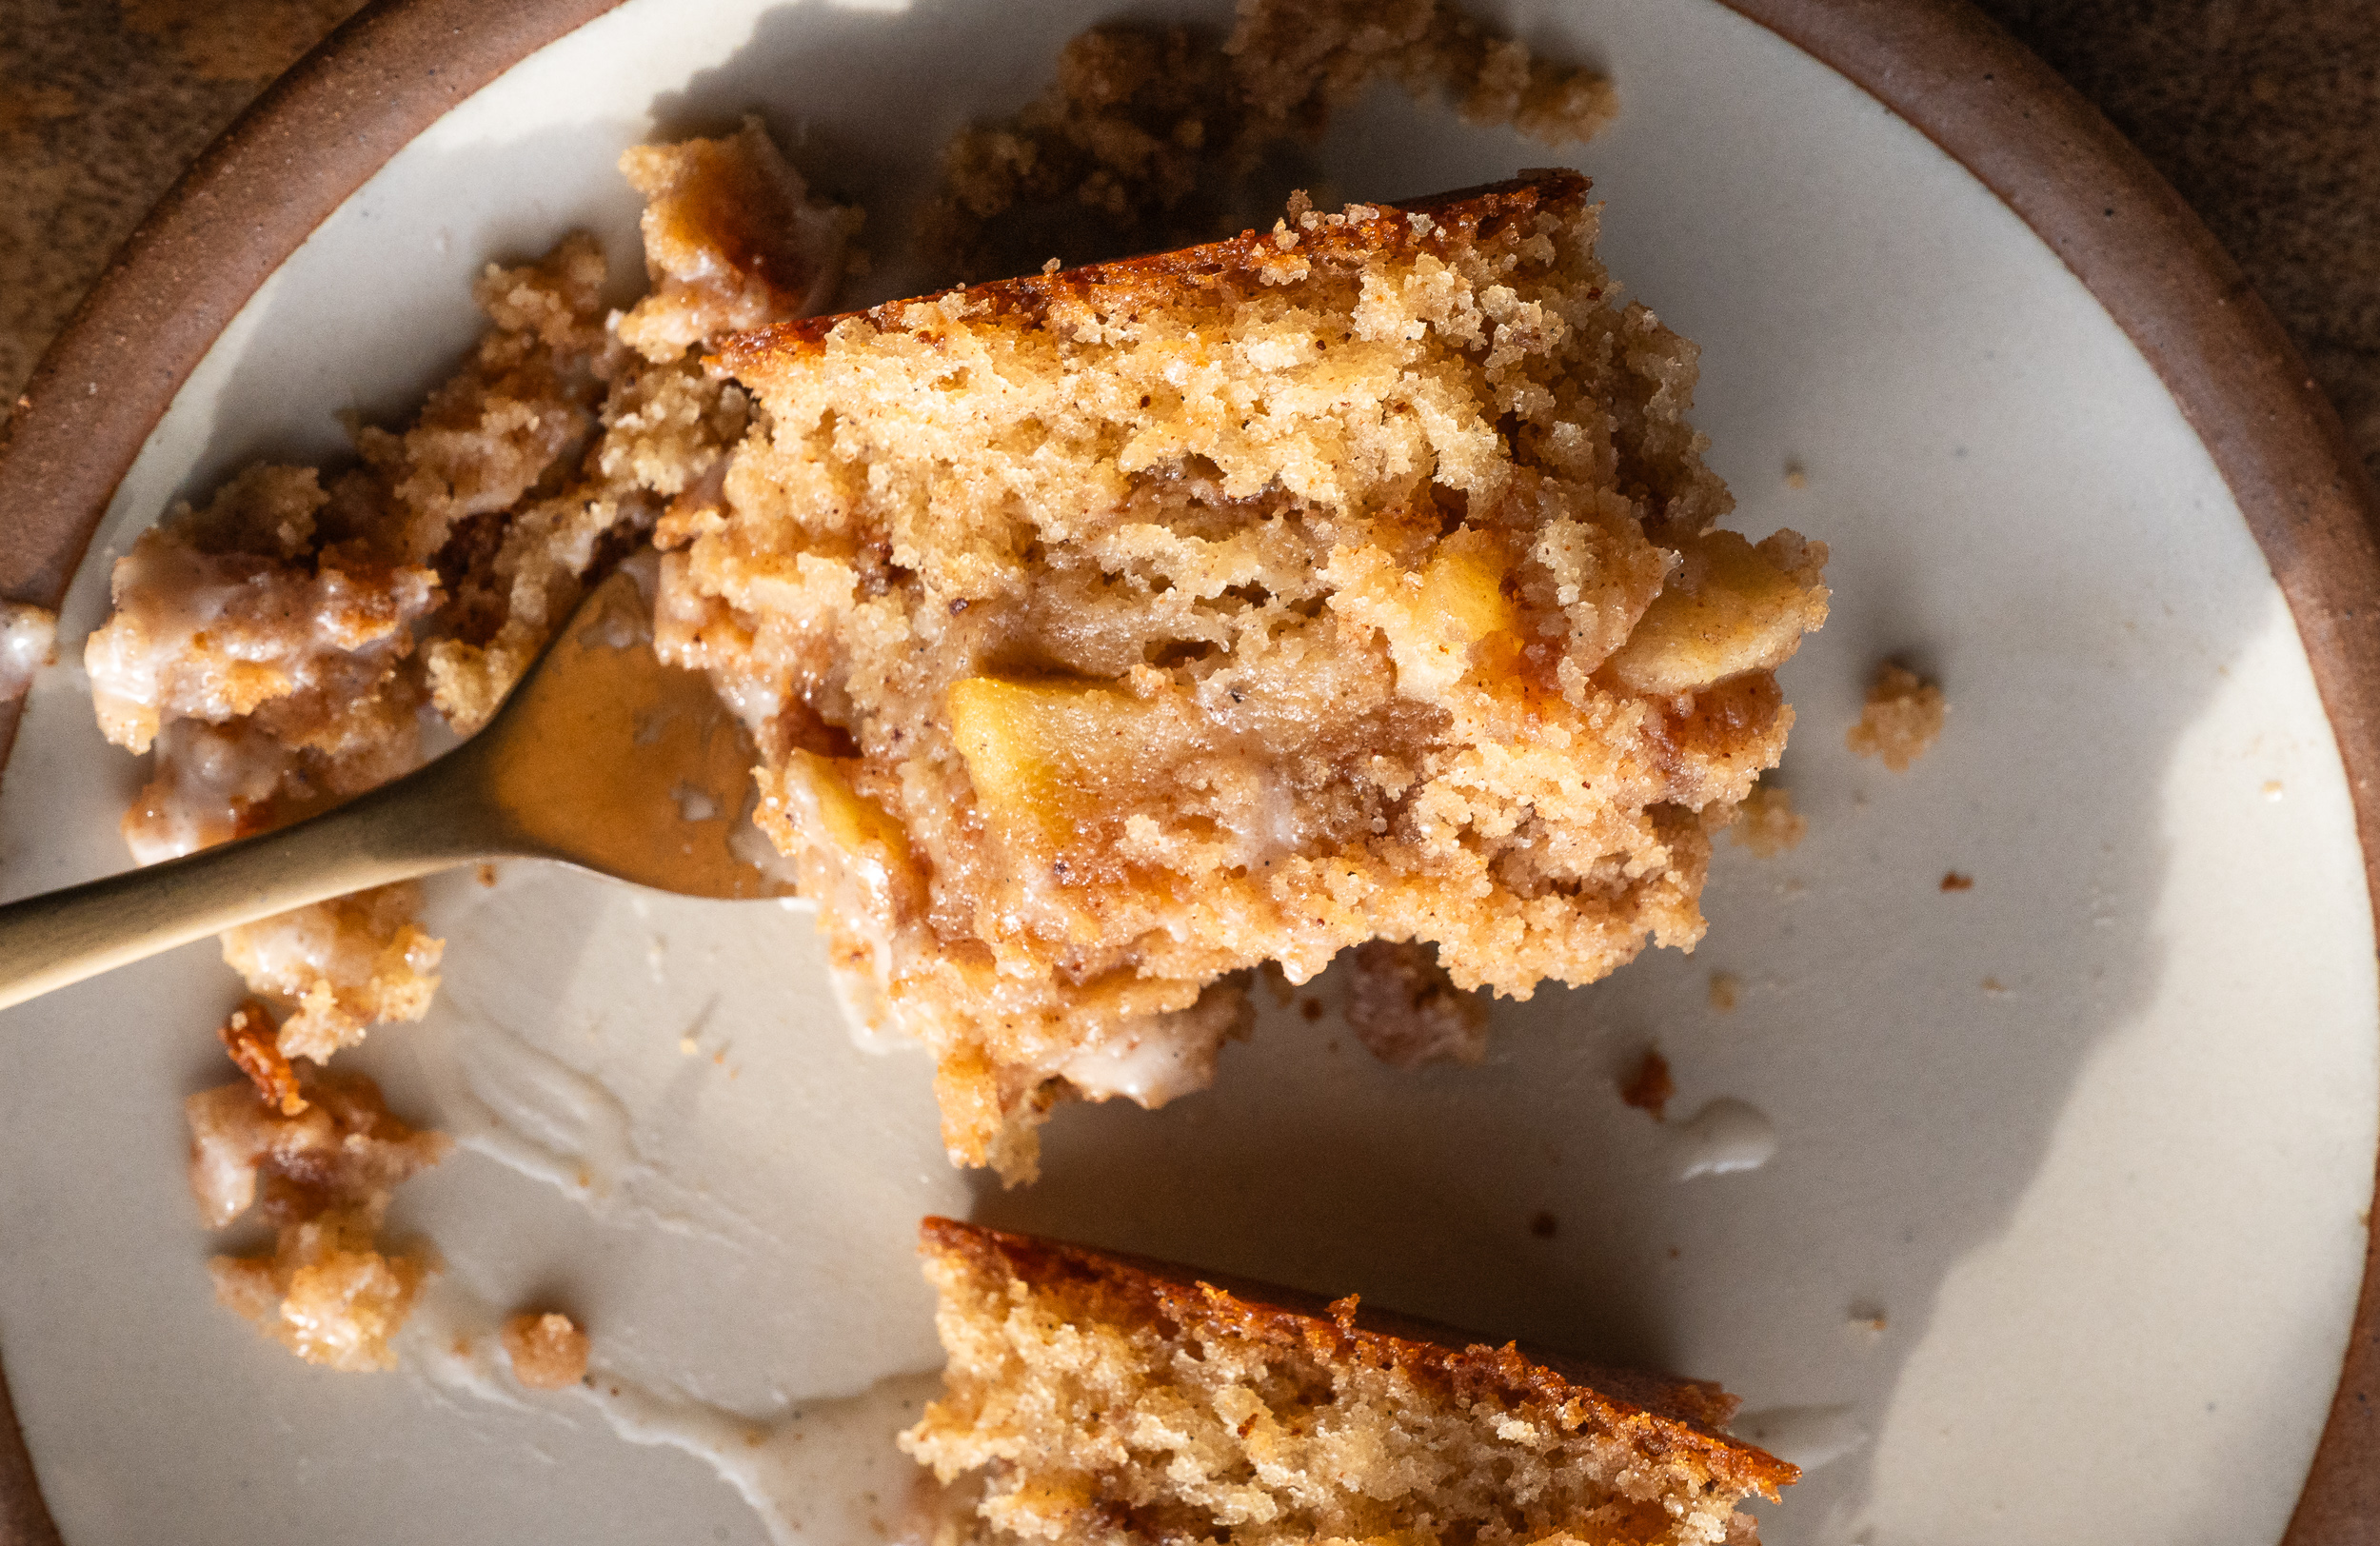
This coffee cake was an instant hit in my family, and didn't take long to disappear. If you enjoy the flavors of cinnamon and apples, you will enjoy this recipe perfect for apple season! Also check out my apple fritter loaf during apple season!
For this recipe, I like apples that soften as they bake but still hold their shape. Honeycrisp and granny smith apples are my favorite because they are naturally sweet, slightly tart, and stay firm after cooking. You can also combine one of each, that's more sweet and one that is more tart for a more complex apple flavor. For the best texture, I like to peel the apples before dicing them into small cubes, roughly 1/4 inch, so they cook evenly and are easy to slice through.
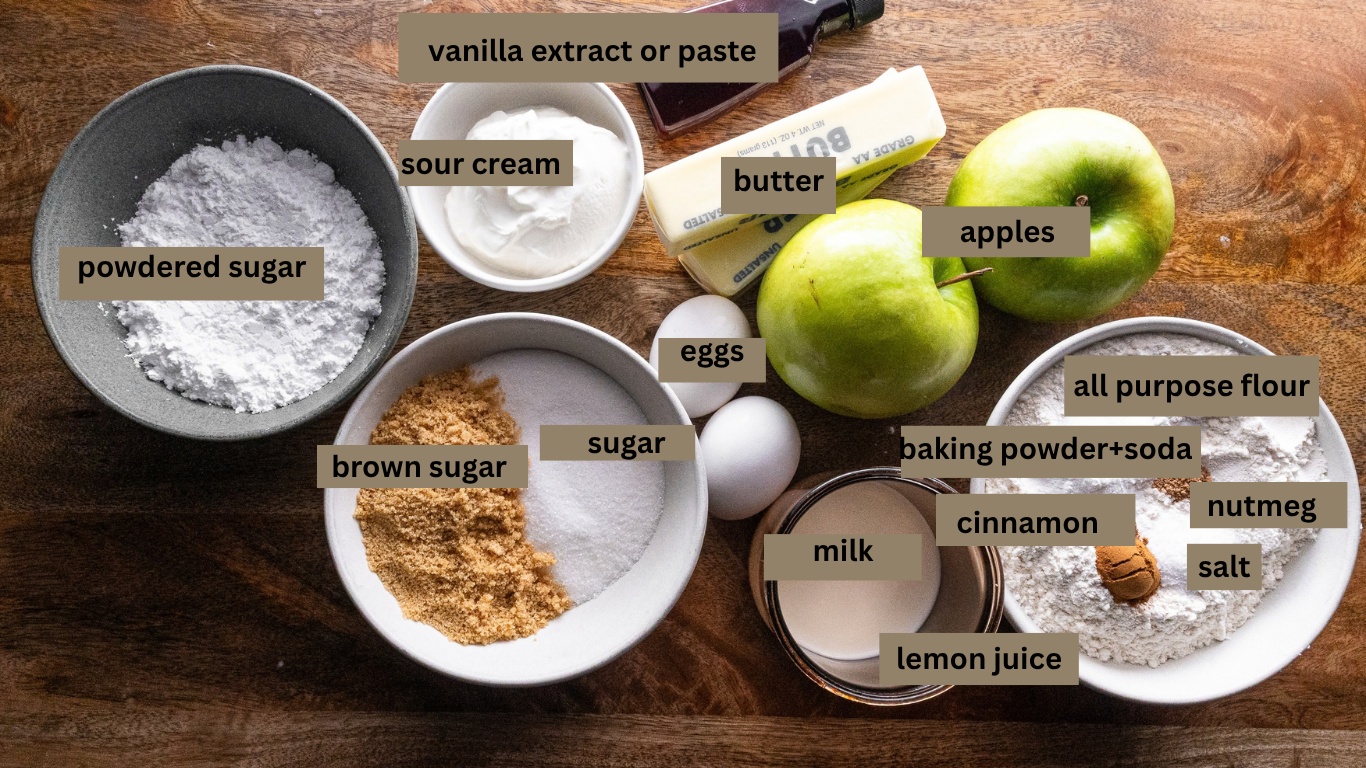
Regular melted butter would work, but browning the butter adds toasted milk solids that bring out the caramel notes in the brown sugar and apples. Make sure you scrape all of those browned bits from the bottom of the saucepan. That's where so much of the flavor lives!
Sour cream gives the cake moisture and richness without making the batter too loose. It also helps create a soft, tender crumb that stays moist for several days.
A small amount of milk loosens the thicker sour cream batter and helps keep the cake from becoming overly dense.
Brown sugar is added to the batter, cinnamon ribbon, and crumb topping. Its molasses flavor works beautifully with cinnamon and gives the coffee cake a warm caramelized flavor.
Cinnamon is used in several layers, but each one tastes slightly different once baked. The cinnamon in the cake is subtle, the ribbon is more concentrated, and the crumb gives you that classic cinnamon coffee cake flavor.
The apples only need a small amount. Lemon juice wakes up their flavor and keeps the filling from tasting overly sweet. You can also use apple cider vinegar if you don't have lemon!
Flour helps with the structure of the cake. I also added a tablespoon of flour to the apple filling to absorbs excess liquid released by the apples as they cook. This keeps the apple layer soft rather than syrupy or wet underneath the crumb.
Because this recipe uses browned butter in several components, you can brown the butter in batches or brown enough for the entire recipe at once and divide it afterward.
Add the butter to a light colored saucepan over medium heat. Allow it to melt, then continue cooking as it bubbles and foams. Stir or swirl frequently. After several minutes, the bubbling will begin to calm and the milk solids on the bottom of the pan will turn golden brown. Once the butter smells deeply nutty and the milk solids are amber brown, remove it from the heat immediately. Pour the butter, including all the browned milk solids, into heat safe bowls. Allow the butter for the cake batter to cool for about 10 to 15 minutes before using it till it's cool to touch. For the crumb topping, there's no need to cool the butter and for the glaze I let it cool for at least 5 minutes.
In a medium bowl, combine the brown sugar, granulated sugar, flour, cinnamon, salt, and nutmeg if using. Add the browned butter and mix with a fork or your fingers until large crumbs begin to form. You want a mixture of small crumbs and larger clusters rather than a completely uniform texture. Place the crumb topping in the refrigerator while you prepare the cake batter.
In a saucepan or skillet, you can use the same one used to brown the butters and add 2 TBSP of butter and when just melted, add the diced apples, brown sugar, cinnamon, salt, lemon juice, and salt. Cook over medium heat for about 4 to 6 minutes, stirring occasionally. The apples should begin to soften but should still hold their shape. Turn off the heat and stir in the vanilla. Sprinkle the flour over the apples and stir until evenly coated. Remove from the heat and allow the apple mixture to cool completely. Don't add hot apples to the cake batter.
In a small bowl, combine the brown sugar, cinnamon, and salt. Mix until evenly combined and set aside.
Preheat the oven to 350°F. Grease and line an 8 x 8-inch light-colored metal baking pan with parchment paper, leaving enough overhang to lift the cake from the pan after baking. In a medium bowl, whisk together the flour, baking powder, baking soda, salt, cinnamon, and nutmeg and set aside. In a large mixing bowl, whisk together the cooled browned butter, granulated and brown sugar till combined. It will look grainy. Add the eggs one at a time, whisking until combined. Mix in the vanilla, sour cream and milk and whisk until smooth. Add the dry ingredients to the wet ingredients. And combine everything together just until no visible streaks of flour remain. Do not overmix. The batter should be thick but spreadable.
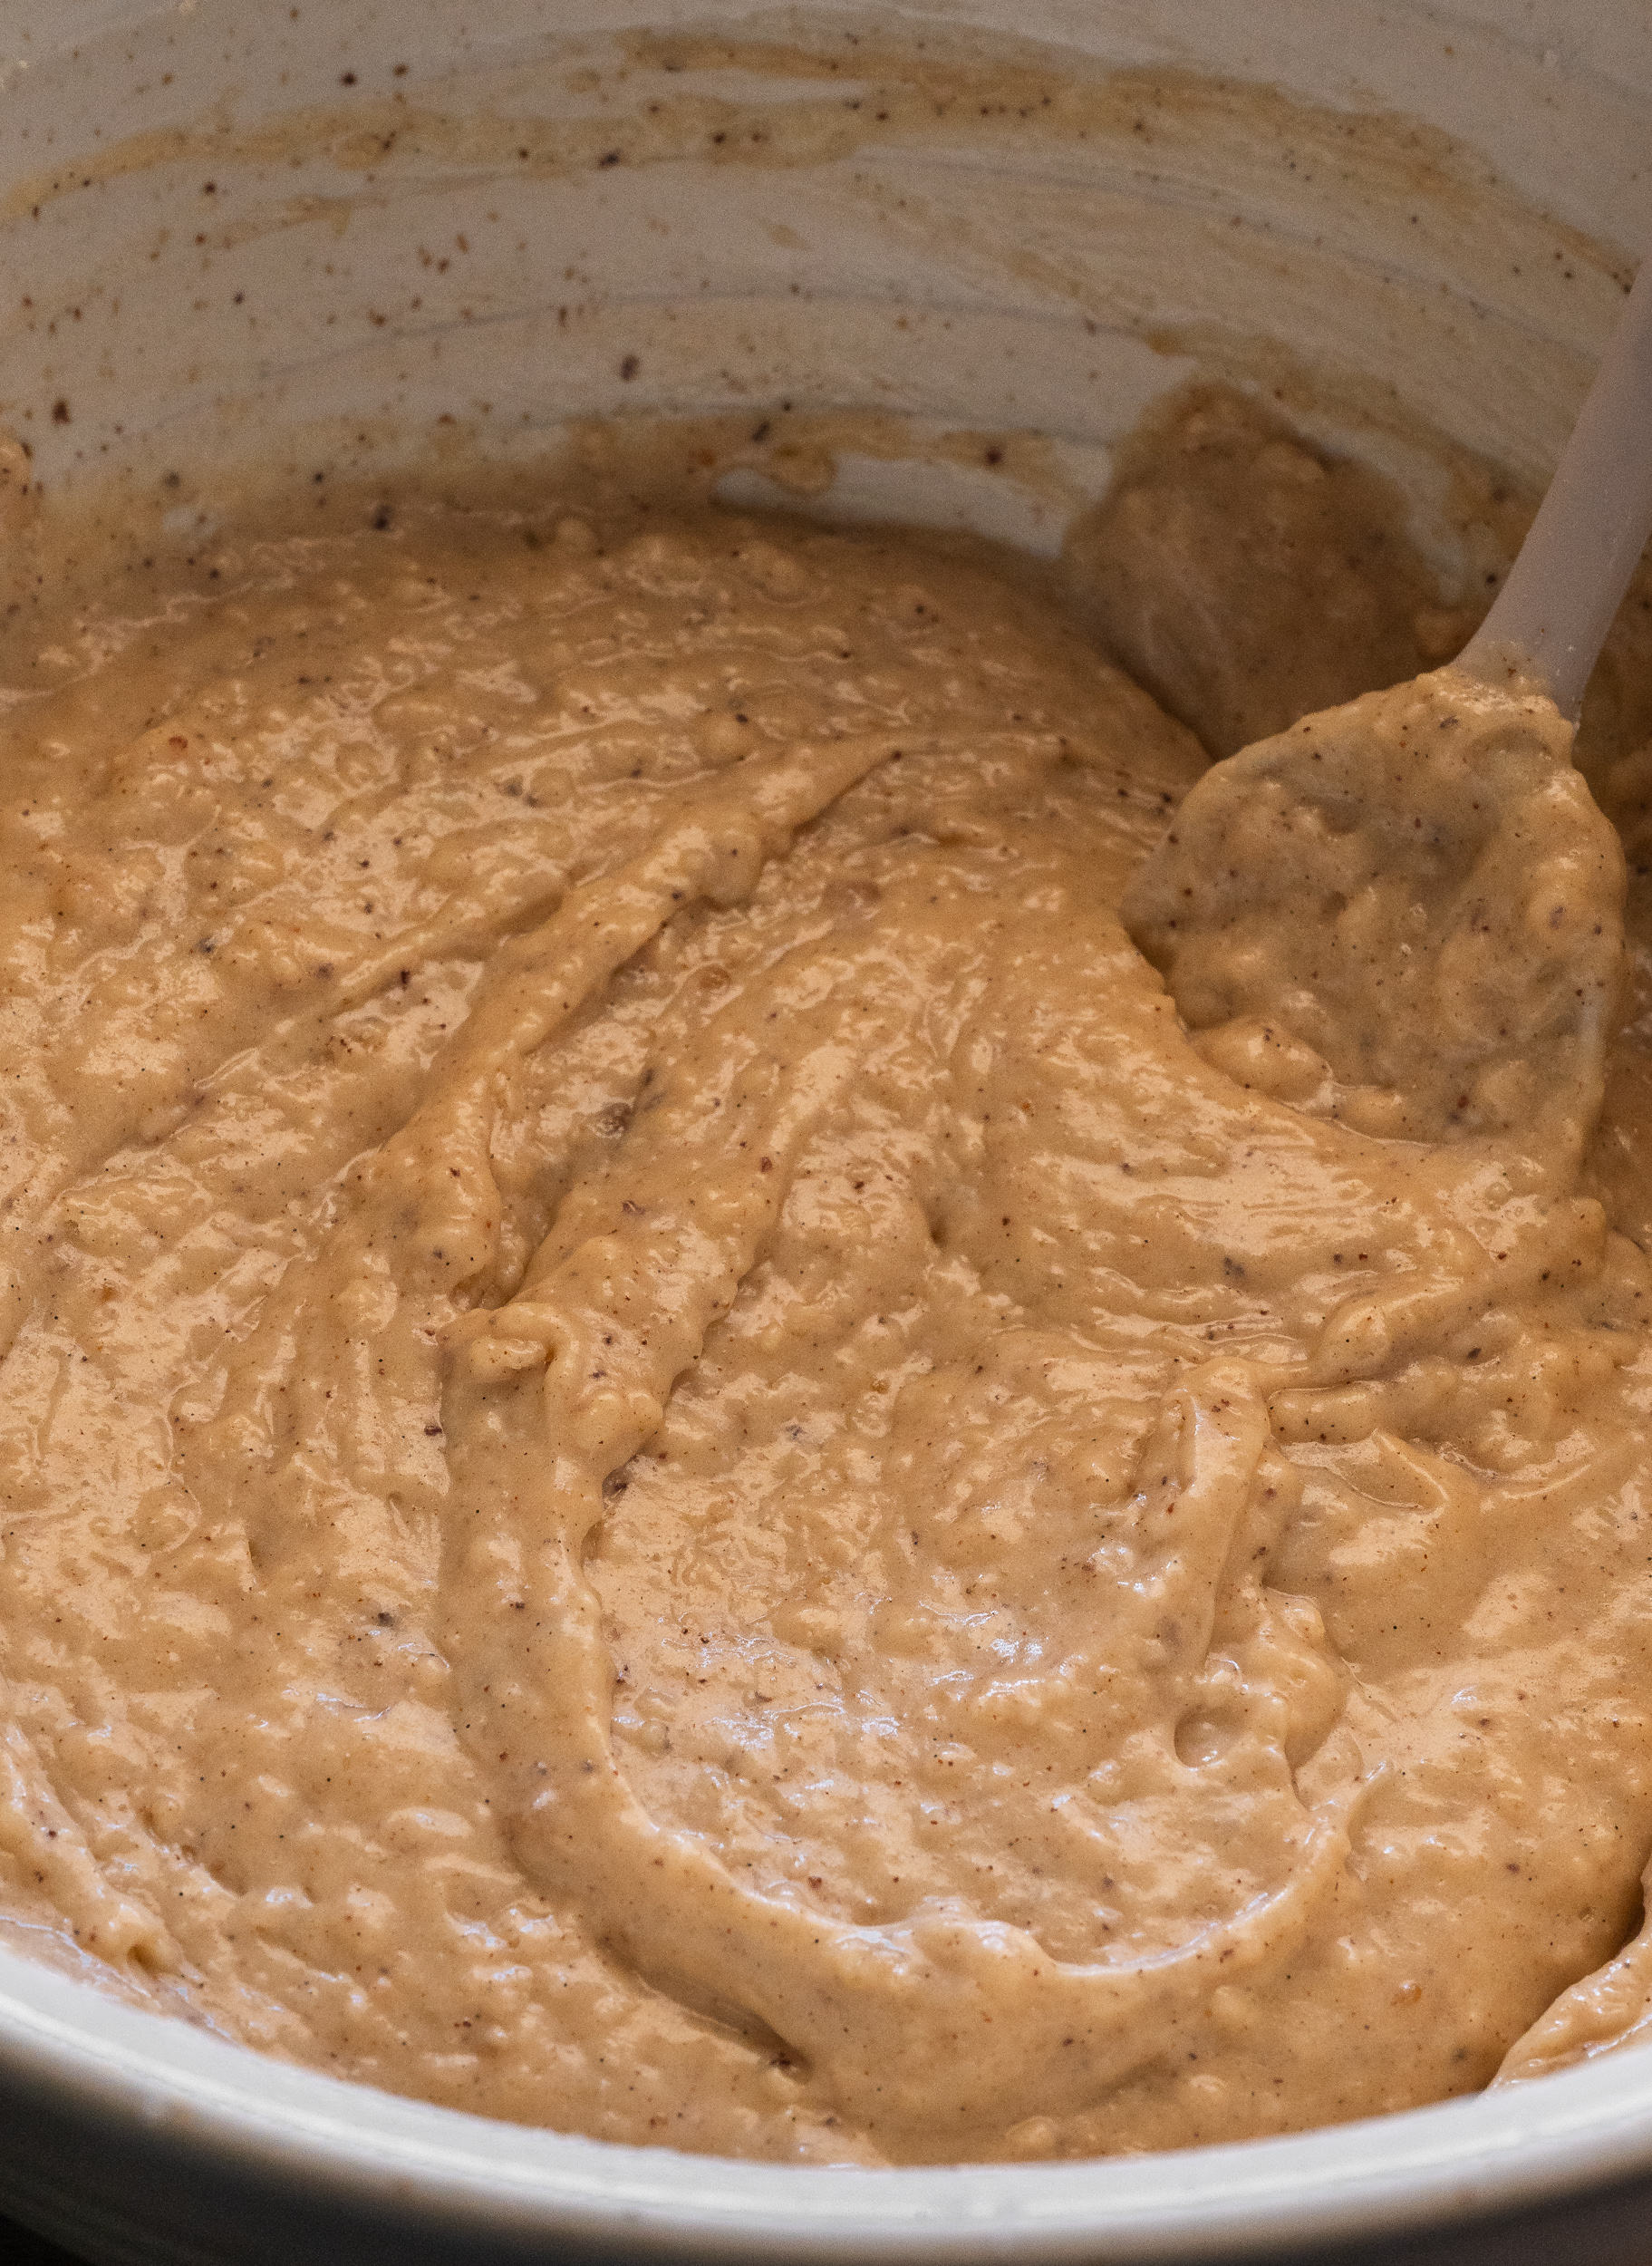
Spread a little more than half of the cake batter evenly into the prepared pan. An offset spatula works especially well because the batter will be fairly thick. Sprinkle all the cinnamon sugar mixture evenly over the batter. Leave a small border around the edges so the cinnamon sugar stays mostly inside the cake. Dollop the remaining batter over the cinnamon layer. Gently spread the batter until the cinnamon sugar is mostly covered. Don't worry if a few spots peek through. Spoon the cooled apples evenly over the top of the batter. Gently press some of the apples into the surface without pushing them completely into the batter. Lastly scatter the crumb topping generously over the apples, breaking the crumbs with your finger, keeping some pieces small and pinch others into larger clusters for the best bakery style texture.
Bake at 350°F for approximately 50 to 60 minutes. Because the apples and crumb make this a thick coffee cake, it may need slightly longer depending on your pan and oven. The cake is done when the center looks set rather than wet, the crumb is golden brown, and the cake lightly springs back when touched. When inserting a toothpick into a cake section comes out with a few moist crumbs. Try not to insert the toothpick directly through a piece of apple because the fruit may make the tester look wetter than the cake actually is. If the crumb begins browning too quickly before the center is baked, loosely tent the pan with foil for the remaining baking time. Allow the coffee cake to cool in the pan for at least 30 to 45 minutes before glazing.
Brown the tablespoon of butter and transfer it to a small bowl. Whisk in the powdered sugar, vanilla, salt, and 1 tablespoon of milk. Add additional milk a teaspoon at a time until the glaze reaches your desired consistency. Drizzle the glaze over the cooled coffee cake and allow it to set for several minutes before slicing.
Very hot butter can warm the eggs and sour cream too quickly. The butter can still be slightly warm, but it shouldn't be piping hot.
Hot apples can begin melting the batter and crumb before the cake reaches the oven.
They will continue cooking inside the coffee cake. You only want to give them a head start on the stovetop.
Mix only until the flour disappears. Overmixing develops excess gluten and can make coffee cake tough rather than tender.
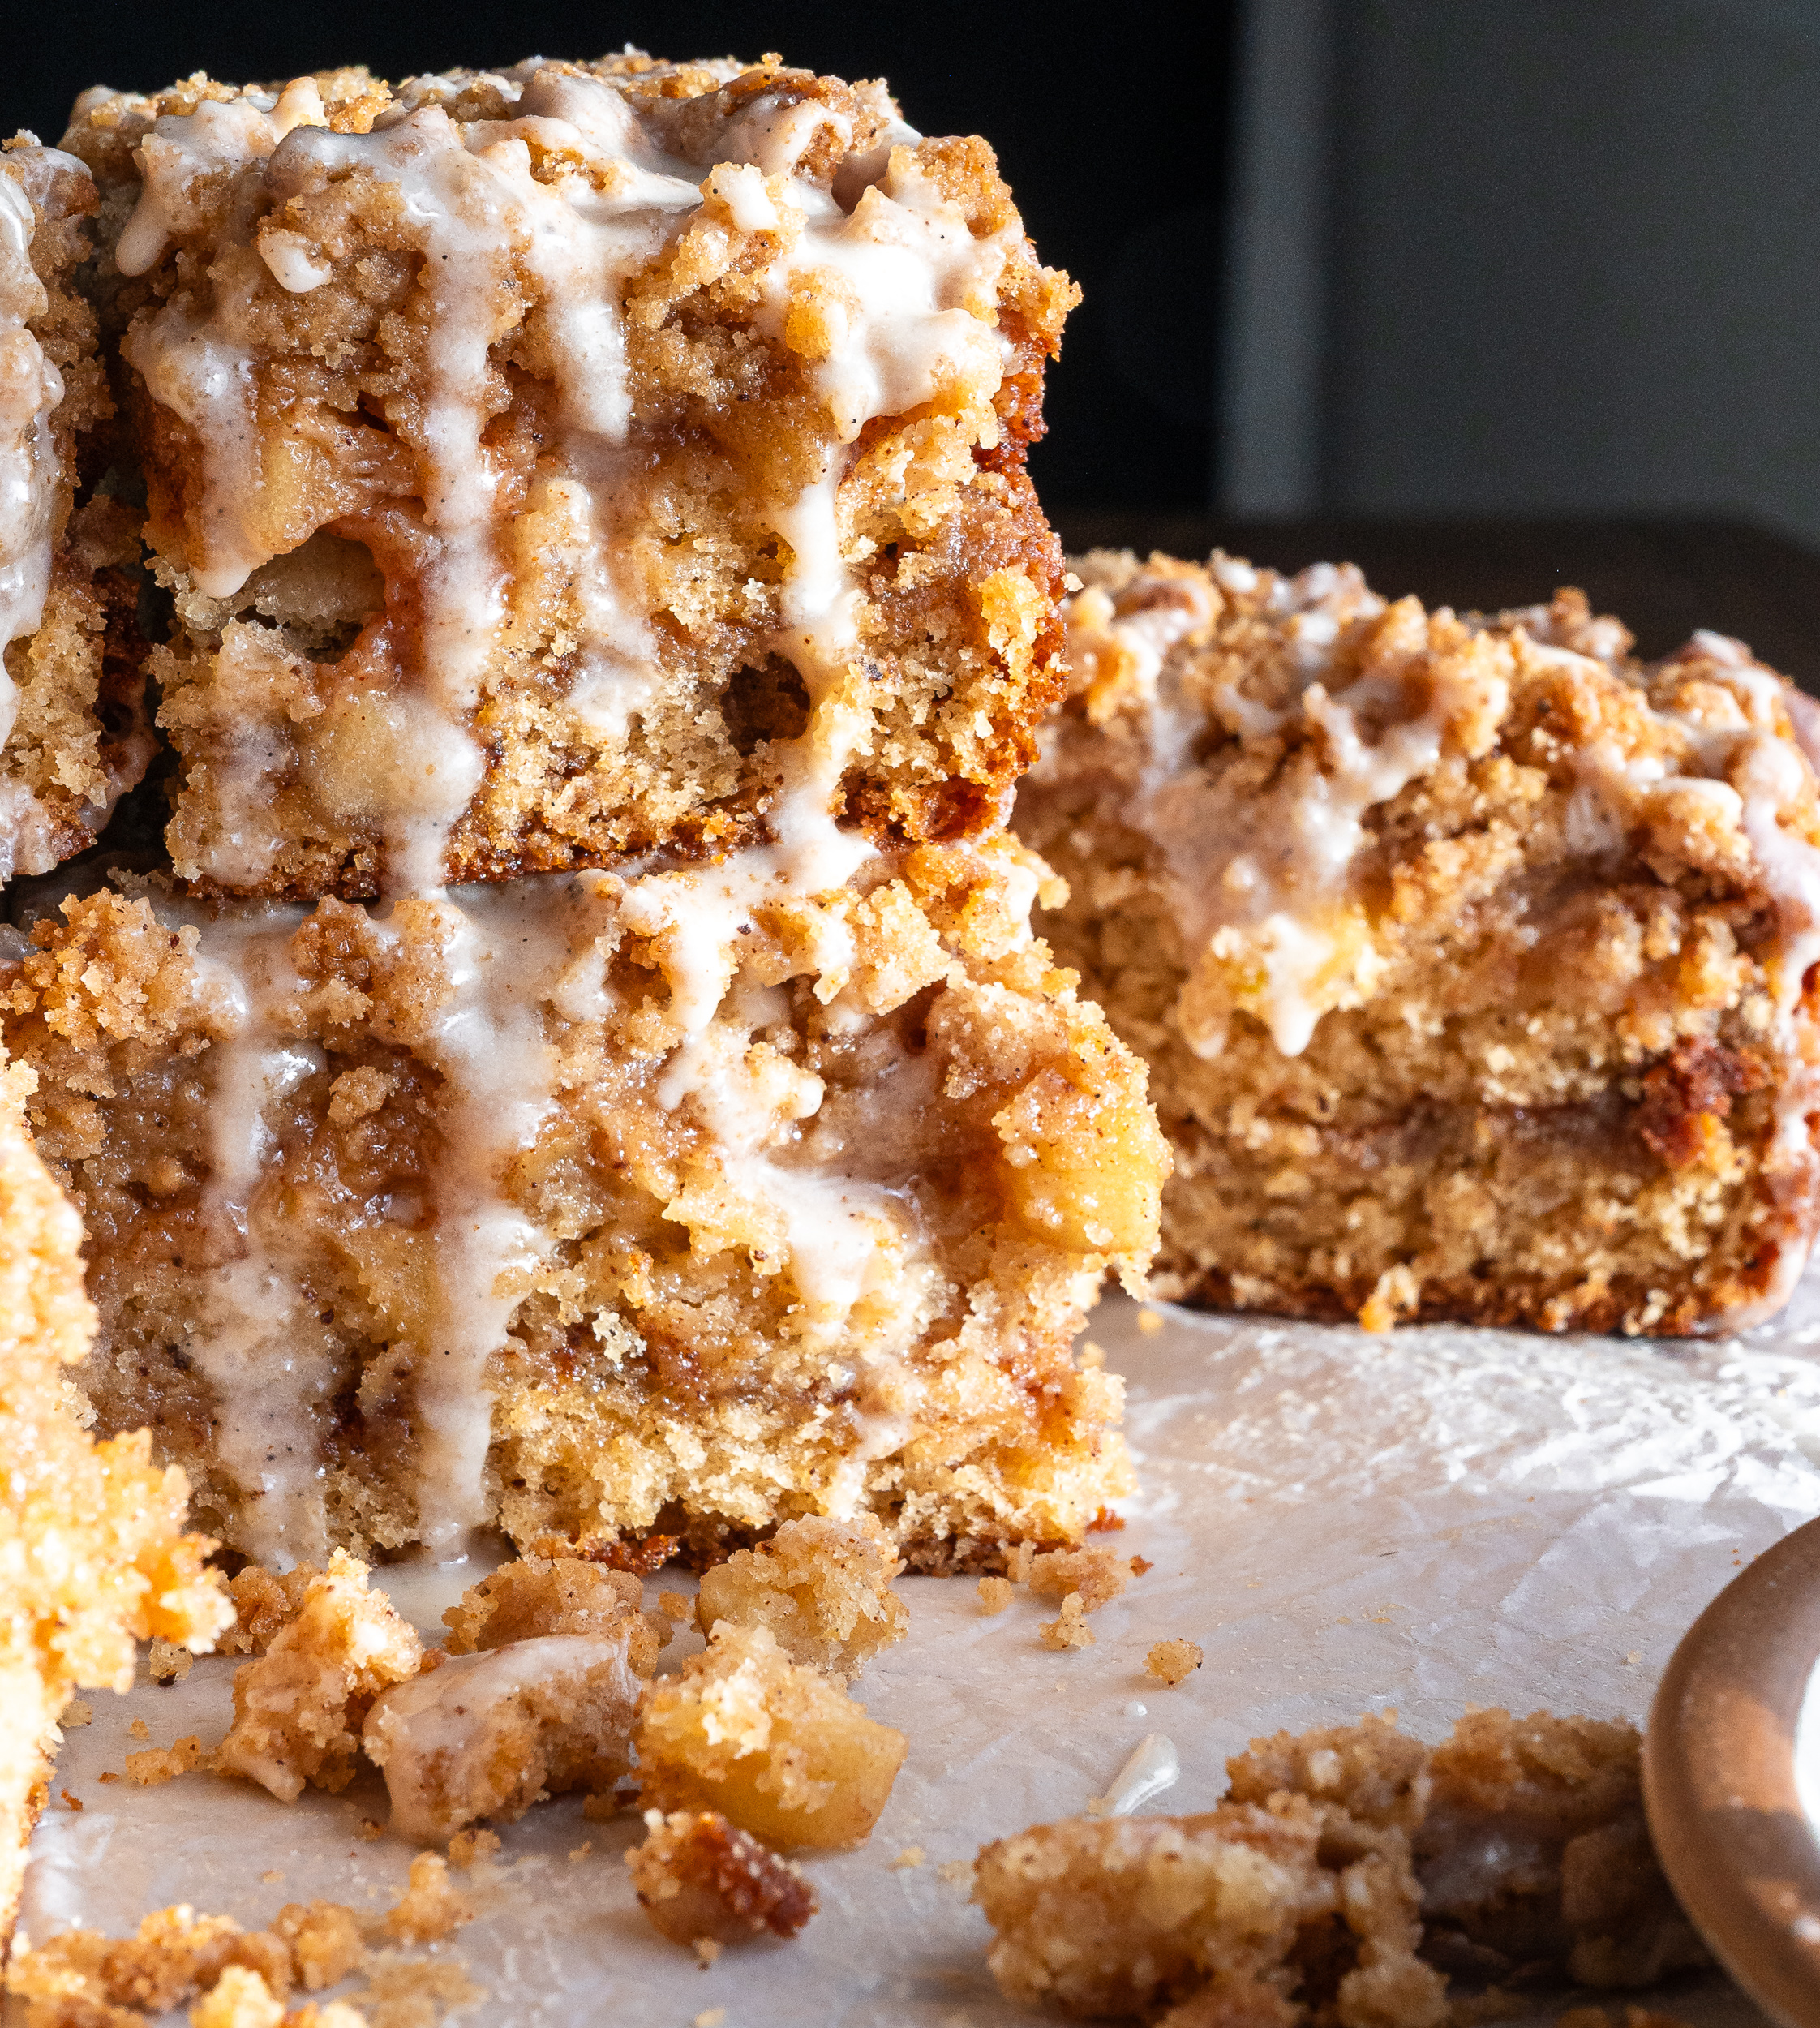
Having at least one extra large crumb topping on your coffee cake slice is part of the moment for eating a streusel topping.
A light colored metal pan gives the coffee cake more even browning and helps the center bake through before the edges become too dark.
Yes. A 9 inch round cake pan or springform pan can work, but the cake will be slightly thinner and may bake a little faster. Begin checking it around the 45 minute mark. For the tallest bakery-style coffee cake, I prefer an 8 x 8-inch metal pan.
I recommend it. Apple peels can remain slightly chewy even after baking, especially underneath a soft crumb topping. Peeled apples create a softer, more cohesive texture.
Full fat plain greek yogurt can generally be substituted in equal amounts, although sour cream gives the cake a slightly richer texture.
Cooking the apples briefly helps remove some of their moisture and ensures they become tender by the time the coffee cake is finished baking. It also lets the cinnamon, brown sugar, butter, and vanilla coat every piece before the apples go into the cake.
Keeping the cinnamon ribbon separate gives the cake more contrast. You get soft cinnamon cake, a concentrated brown sugar cinnamon layer in the middle, apples on top, and cinnamon crumb above everything. Instead of every bite tasting exactly the same, each layer brings something slightly different.
Yes. Bake the coffee cake the day before serving and store it tightly covered once completely cool. You can glaze it the same day or wait until shortly before serving for the prettiest finish.
-Store the cooled coffee cake tightly covered at room temperature for up to 2 days.
-Store in the refrigerator for about 4 to 5 days in an airtight container.
-Freeze for up to 2 months. Wrap individual slices tightly in plastic wrap, then place them inside a freezer safe container or bag.
Add the butter to a light colored saucepan over medium heat. Let it melt completely, then continue cooking as it begins to bubble, and foam. Then it will have a crackle sound. Stir or swirl the pan frequently so the milk solids brown evenly. After several minutes, the foam will begin to settle and you’ll see golden brown specks forming on the bottom of the pan. Once the butter smells nutty, the milk solids are a deep golden amber, and you don't hear that crackle sound anymore, immediately remove it from the heat so it doesn’t burn. Pour the butter, including all of the browned bits, into heat safe bowls. Let the butter for the cake batter cool for about 10 to 15 minutes, or until cool to the touch. The butter for the crumb topping can be used warm, and the butter for the glaze should cool for about 5 minutes.
Combine the brown sugar, granulated sugar, flour, cinnamon, salt, and nutmeg, if using. Add the browned butter and mix with a fork or your fingers until crumbs form. Keep a mixture of small crumbs and larger clusters. Refrigerate while you prepare the cake.
In the same saucepan or a skillet, melt 2 tablespoons of butter. Add the diced apples, brown sugar, cinnamon, lemon juice, and salt. Cook over medium heat for 4 to 6 minutes, stirring occasionally, until the apples begin to soften but still hold their shape. Remove from the heat and stir in the vanilla. Sprinkle the 1 TBSP of flour over the apples and stir until evenly coated. Let the apples cool completely.
Mix the brown sugar, cinnamon, and salt together in a small bowl. Set aside.
Preheat the oven to 350°F. Grease and line an 8 x 8 inch metal baking pan with parchment paper. Whisk together the flour, baking powder, baking soda, salt, cinnamon, and nutmeg in a medium bowl. In a large bowl, whisk the cooled browned butter and granulated and brown sugar together. The mixture will look slightly grainy. Add the eggs one at a time, then whisk in the vanilla, sour cream, and milk until smooth. Add the dry ingredients and mix just until no streaks of flour remain. Do not overmix.
Spread a little more than half of the batter into the prepared pan. Sprinkle all the cinnamon ribbon evenly over the top, leaving a small border around the edges. Dollop the remaining batter over the cinnamon layer and gently spread it over the top. Spoon the cooled apples evenly over the batter and lightly press them into the surface. Scatter the crumb topping over the apples, with your fingers breaking some into smaller crumbs and pinching others into larger clusters.
Bake for 50 to 60 minutes, or until the center is set, the crumb is golden brown, and a toothpick inserted into a cake section comes out with a few moist crumbs. Avoid testing directly through an apple. If the topping browns too quickly, loosely tent the cake with foil. Cool in the pan for 30 to 45 minutes before glazing.
Brown the tablespoon of butter and let it cool for about 5 minutes. Whisk in the powdered sugar, vanilla, salt, and 1 tablespoon of milk. Add more milk, 1 teaspoon at a time, until thick but pourable. Drizzle over the cooled coffee cake and let the glaze set before slicing.
You want a golden color, not burnt, like toasted hazelnut, not coffee ash.
Measuring flour properly makes a big difference in how your baked recipes turn out. For best results, use a kitchen scale and measure in grams. This ensures consistency and prevents adding too much flour, which can make this cake dry or dense.
If you don’t have a kitchen scale:
Too much flour is one of the most common reasons baked recipes can become dry and cakey
I’m so grateful you’re here! Have a look around at some of my favourite recipes and stay a while.
Get a fresh delivery of only the goods delivered to your inbox.


Leave a Comment
Did you make this recipe? I'd love to hear how it turned out. Leave a comment and share your tweaks.
-- / 5 average rating from -- reviews
Lorem ipsum dolor sit amet, consectetur adipiscing elit. Suspendisse varius enim in eros elementum tristique. Duis cursus, mi quis viverra ornare, eros dolor interdum nulla, ut commodo diam libero vitae erat. Aenean faucibus nibh et justo cursus id rutrum lorem imperdiet. Nunc ut sem vitae risus tristique posuere. uis cursus, mi quis viverra ornare, eros dolor interdum nulla, ut commodo diam libero vitae era
Lorem ipsum dolor sit amet, consectetur adipiscing elit. Suspendisse varius enim in eros elementum tristique. Duis cursus, mi quis viverra ornare, eros dolor interdum nulla, ut commodo diam libero vitae erat. Aenean faucibus nibh et justo cursus id rutrum lorem imperdiet. Nunc ut sem vitae risus tristique posuere. uis cursus, mi quis viverra ornare, eros dolor interdum nulla, ut commodo diam libero vitae era