Bars and Blondies

June 27, 2026

Chewy and Gooey Brown Butter S'mores Blondies

These Brown Butter S'mores Blondies are gooey, chewy, and packed with marshmallow fluff, graham cracker crumbs, and melty milk chocolate.

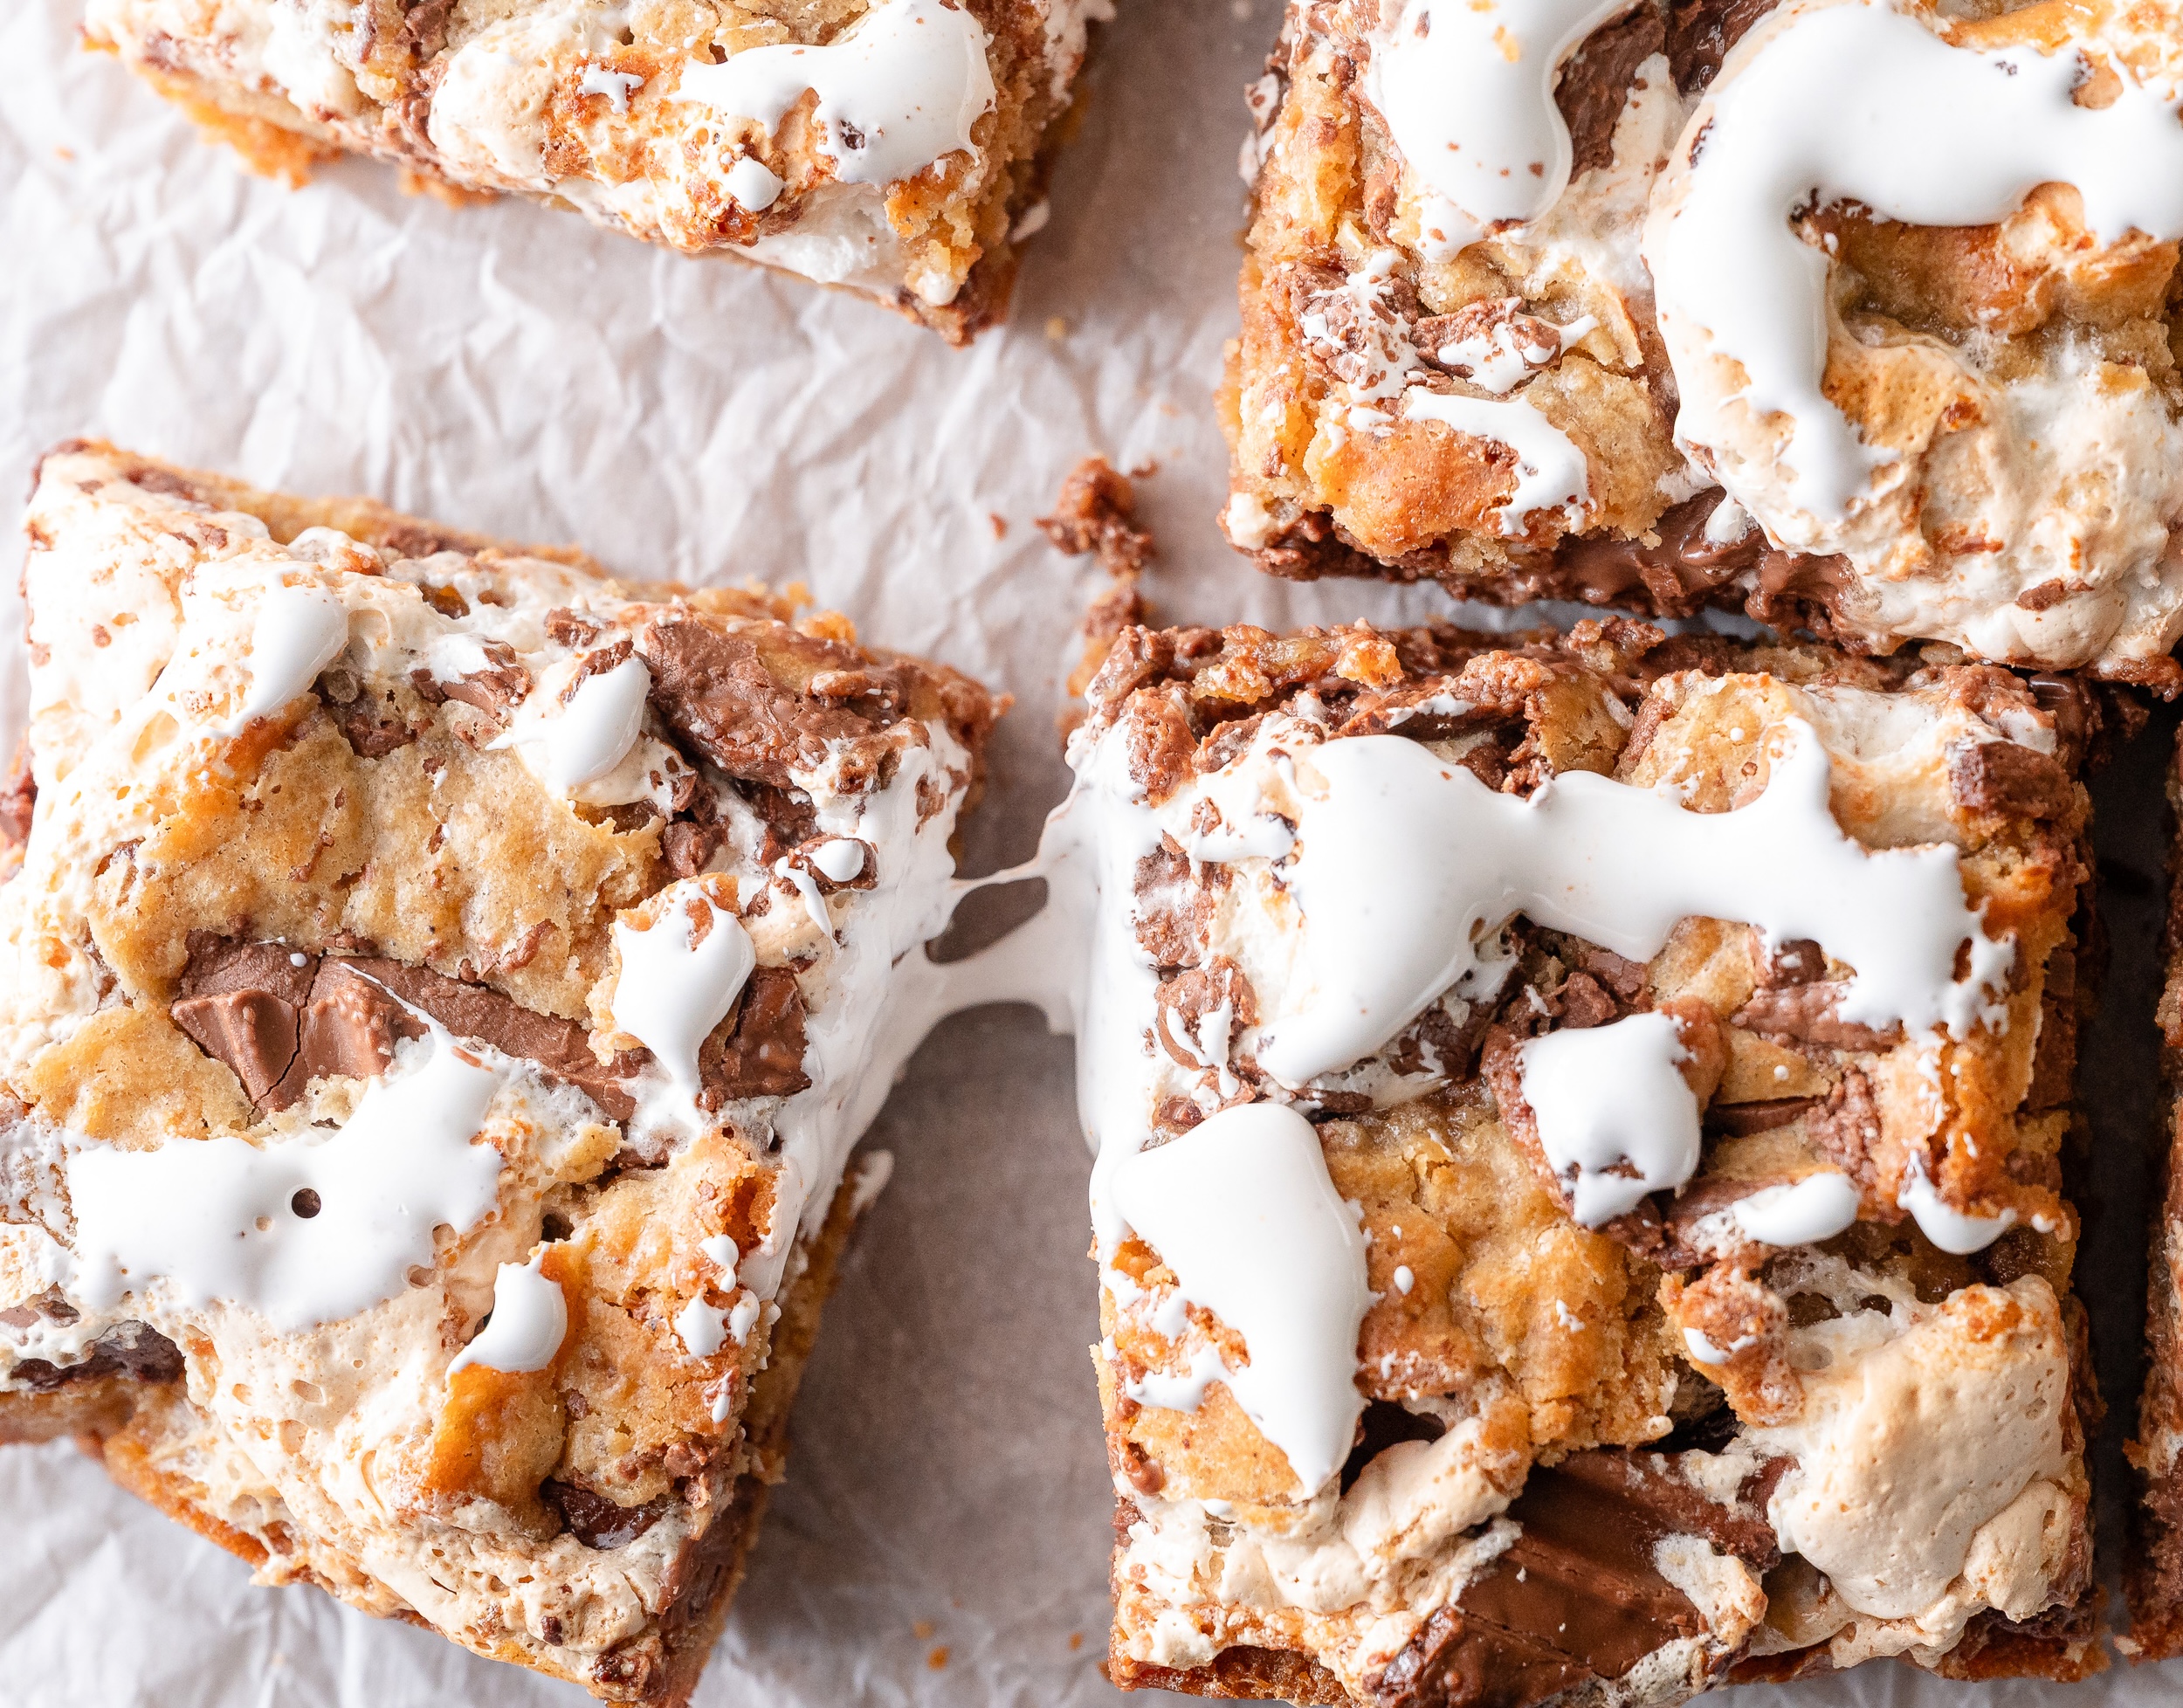
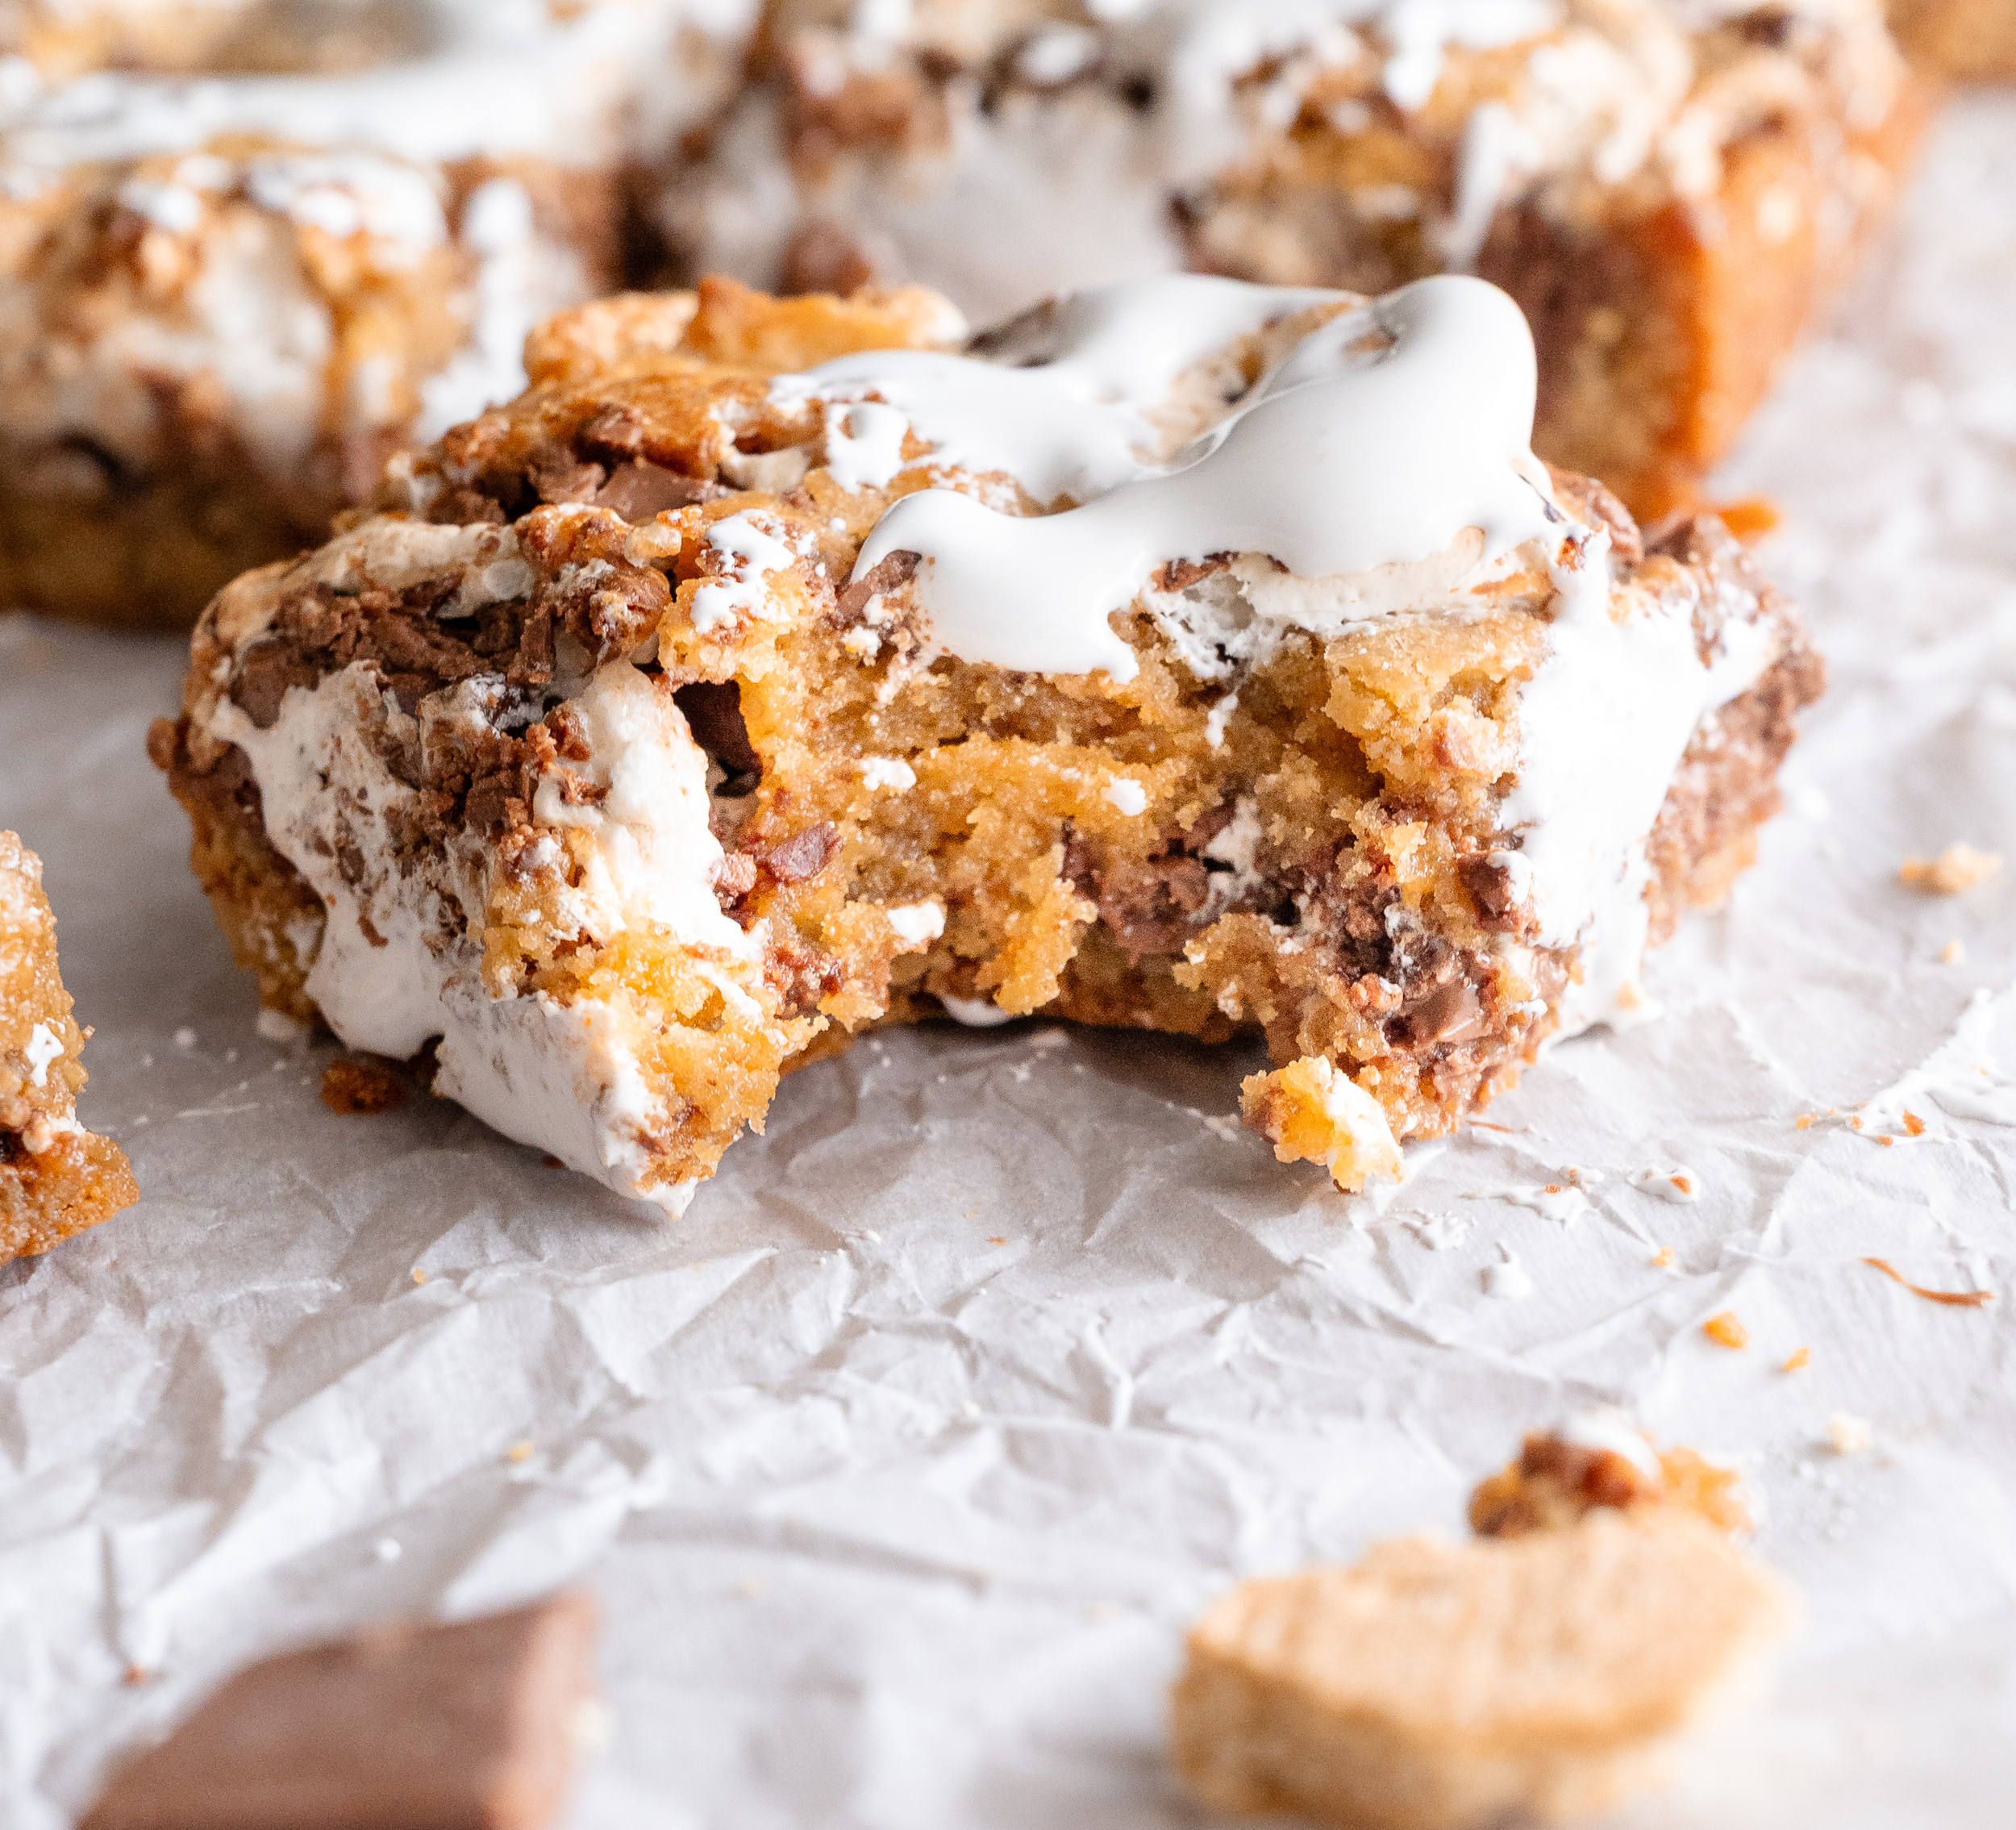
The next best thing to a campfire s'mores, is a s'mores blondie and these Brown Butter S'mores Blondies deliver! The brown butter adds a rich caramelized flavor while graham cracker crumbs are mixed directly into the batter for that unmistakable s'mores taste. A layer of marshmallow fluff melts into the center and milk chocolate creates gooey pockets throughout every bite. They're rustic, chewy, and perfectly gooey, making them an easy dessert for summer cookouts, backyard BBQs, or whenever you're craving your favorite summertime flavors.

If you love the flavors of classic s'mores, you'll also love my Brown Butter S'mores Cookies, made with gooey marshmallows, melty chocolate, and graham crackers.

Stacked S'mores Blondies.

Why You'll Love These Blondies

  • Rich brown butter flavor
  • Gooey marshmallow center
  • Easy one pan dessert
  • Perfect for summer parties and cookouts.

Ingredients to make s'mores blondies.

Ingredients to Make Brown Butter S'mores Blondies

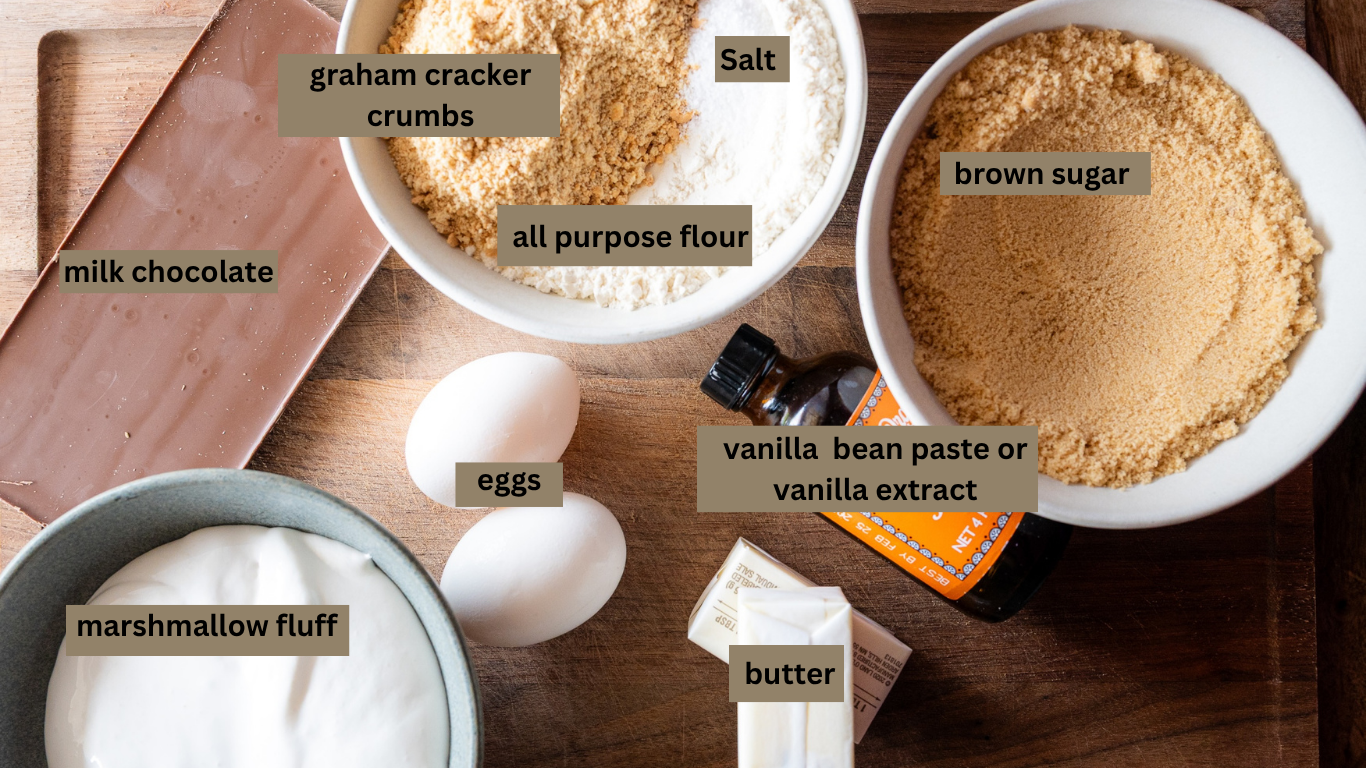
Unsalted Butter – Browning the butter is what makes these blondies stand out. It gives these blondies a richer flavor than traditional blondies and pairs perfectly with the classic s'mores ingredients.

Light Brown Sugar – Light brown sugar helps the blondies to stay soft and chewy.

Egg + Egg Yolk – Using one whole egg and an extra yolk gives these blondies their rich texture. The additional yolk adds fat for a fudgier bite without making the blondies cakey.

Vanilla Extract – Vanilla enhances the caramelized notes and rounds out the marshmallow and chocolate flavors.

Kosher Salt – Salt balances the sweetness and intensifies all the flavors.

Graham Cracker Crumbs – Instead of layering whole graham crackers, finely crushed graham cracker crumbs are mixed directly into the blondie batter so every bite tastes like a classic s'more. Using crumbs also keeps the blondies chewy while adding that signature graham cracker flavor.

All-Purpose Flour – Flour provides the structure that keeps these blondies thick and chewy while still allowing the center to stay soft and gooey. Be sure to spoon and level the flour or weigh it with a kitchen scale to avoid dense blondies.

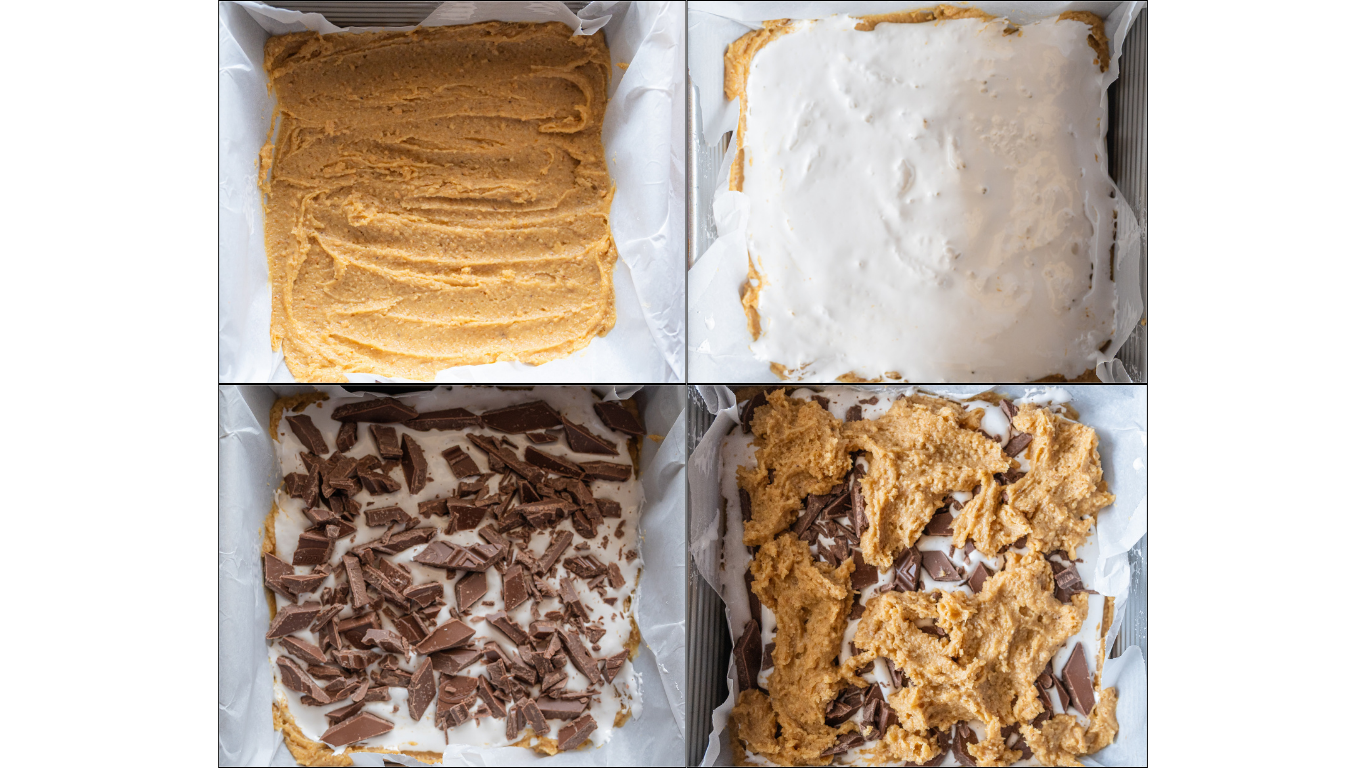
Marshmallow Fluff – Marshmallow fluff creates pockets of gooey marshmallow throughout the center of the blondies.

Milk Chocolate – Milk chocolate is the traditional choice for classic s'mores, giving these blondies the familiar flavor everyone knows and loves. As it bakes, it melts into creamy chocolate pockets throughout the bars. For the most authentic s'mores flavor, use chopped milk chocolate bars instead of dark chocolate.

S'mores blondies.

Steps on How to Make S'mores Blondies

  1. Add  butter to a small saucepan over medium heat. Cook, stirring frequently, until the butter foams and golden brown bits form on the bottom of the pan. The butter should began to boil rapidly, smell nutty and fragrant. Once the rapid bubbling stops and it gets quiet the butter should be a nice amber color. Remove the butter from heat and pour into a large bowl and allow it to cool for 10 to 15 minutes.
  2. Preheat the oven to 350°F (177°C). Line an 8x8-inch baking pan with parchment paper, leaving an overhang for easy removal.
  3. Whisk together the cooled browned butter and light brown sugar until smooth.
  4. Add the egg, egg yolk and vanilla extract. Whisk until glossy.
  5. Stir in the graham cracker crumbs, flour and salt until no dry streaks remain. Be careful not to overmix.
  6. Spread about three quarters (3/4) of the blondie batter into the prepared pan. Spread out evenly.
  7. Spoon the marshmallow fluff over the batter and gently spread into an even layer, leaving a small border around the edges.
  8. Sprinkle the chopped milk chocolate evenly over the marshmallow fluff.
  9. Dollop the remaining blondie batter over the top. It doesn't need to completely cover the filling. The rustic patches allow the marshmallow and chocolate to peek through while baking.
  10. Bake for 24 to 28 minutes, or until the edges are golden brown and the center is just set with a slight wobble.
  11. Cool completely in the pan before slicing. For the cleanest cuts, chill the blondies in the fridge for 30 minutes before cutting with a sharp knife.
Layers of s'mores blondie in a square pan.

Pro Tips for the Best S'mores Blondies

  • Use milk chocolate for the most traditional s'mores flavor. It melts beautifully and tastes just like a classic campfire s'more.
  • Browning the butter adds a rich, nutty flavor that takes these blondie bars to the next level.
  • Let the blondies cool completely before slicing. They'll continue to set as they cool while staying perfectly gooey in the center.
  • Store leftovers in an airtight container for up to 4 days.

Bite of a s'mores blondie.

Frequently Asked Questions

Can I use chocolate chips instead of chopped chocolate?

Yes! Milk chocolate chips work well, but chopped milk chocolate bars create larger pools of melted chocolate throughout the blondies.

Can I use mini marshmallows?

Marshmallow fluff creates the gooey center and gives the best texture. Mini marshmallows can be substituted, but the texture will be slightly different.

Can I freeze these blondies?

Yes. Wrap individual blondies tightly and freeze for up to 2 months. Thaw at room temperature before serving.

If you're a blondie lover, don't miss these favorites:

Chewy and Gooey Brown Butter S'mores Blondies

Gooey blondies made with marshmallow creme and melty chocolate the perfect dessert for the summer!

Prep:

Time:

Total:

Serving:

30

28

88

9

Mins

Mins

Mins

bars

Ingredients

  • 1/2 cup (113g)  unsalted butter *see notes below
  • 3/4 cup (155g) packed light brown sugar
  • 1 egg
  • 1 egg yolk
  • 2 1/2 tsp vanilla extract
  • 1/2 tsp Salt
  • 1/2 cup (60g) graham cracker crumbs finely crushed
  • 1 cup (120g) all-purpose flour - leveled and spooned if not using a kitchen scale **see notes below
  • 1 1/4 cup (125g) marshmallow fluff
  • 4 oz (3/4 cup) milk chocolate chopped or chocolate chips

Instructions

  1. Add  butter to a small saucepan over medium heat. Cook, stirring frequently, until the butter foams and golden brown bits form on the bottom of the pan. The butter should began to boil rapidly, smell nutty and fragrant. Once the rapid bubbling stops and it gets quiet the butter should be a nice amber color. Remove the butter from heat and pour into a large bowl and allow it to cool for 10 to 15 minutes.
  2. Preheat the oven to 350°F (177°C). Line an 8x8-inch baking pan with parchment paper, leaving an overhang for easy removal.
  3. Whisk together the cooled browned butter and light brown sugar until smooth.
  4. Add the egg, egg yolk and vanilla extract. Whisk until glossy.
  5. Stir in the graham cracker crumbs, flour and salt until no dry streaks remain. Be careful not to overmix.
  6. Spread about three quarters (3/4) of the blondie batter into the prepared pan. Spread out evenly.
  7. Spoon the marshmallow fluff over the batter and gently spread into an even layer, leaving a small border around the edges.
  8. Sprinkle the chopped milk chocolate evenly over the marshmallow fluff.
  9. Dollop the remaining blondie batter over the top. It doesn't need to completely cover the filling. The rustic patches allow the marshmallow and chocolate to peek through while baking.
  10. Bake for 24 to 28 minutes, or until the edges are golden brown and the center is just set with a slight wobble.
  11. Cool completely in the pan before slicing. For the cleanest cuts, chill the blondies in the fridge for 30 minutes before cutting with a sharp knife.

Notes: 

*How to Brown Butter (The Right Way)
  1. Place the butter in a light-colored saucepan over medium heat.
  2. Let the butter melt completely, then continue cooking as it begins to foam and bubble.
  3. Swirl the pan occasionally to help the butter cook evenly and prevent the milk solids from sticking to the bottom of the pan.
  4. Watch closely for golden brown bits forming at the bottom. The butter will go through a loud bubbling stage while the water cooks off.
  5. As the bubbling sound begins to quiet down, the butter will start smelling deeply nutty and toasted while turning a rich amber color.
  6. Remove from the heat immediately and pour the brown butter into a mixing bowl to stop the cooking process and prevent burning.

You want a golden color, not burnt, like toasted hazelnut, not coffee ash.

**How to Measure Flour Correctly

Measuring flour properly makes a big difference in how your baked recipes turn out. For best results, use a kitchen scale and measure in grams. This ensures consistency and prevents adding too much flour, which can make this cake dry or dense.

If you don’t have a kitchen scale:

  • Do not scoop flour directly with the measuring cup.
  • Use a spoon to gently fill the measuring cup.
  • Level it off with the back of a knife.
  • Do not pack the flour down.

Too much flour is one of the most common reasons baked recipes can become dry and cakey

Leave a Comment

Did you make this recipe? I'd love to hear how it turned out. Leave a comment and share your tweaks.

POST COMMENT
Thank you! Your submission has been received!
Oops! Something went wrong while submitting the form.

-- / 5 average rating from -- reviews

Author Name
Comment Time

Lorem ipsum dolor sit amet, consectetur adipiscing elit. Suspendisse varius enim in eros elementum tristique. Duis cursus, mi quis viverra ornare, eros dolor interdum nulla, ut commodo diam libero vitae erat. Aenean faucibus nibh et justo cursus id rutrum lorem imperdiet. Nunc ut sem vitae risus tristique posuere. uis cursus, mi quis viverra ornare, eros dolor interdum nulla, ut commodo diam libero vitae era

Reply